Difference between revisions of "Insert Pictures or Documents"
From energypedia
***** (***** | *****) m |
***** (***** | *****) m (Protected "Help:Insert Pictures or Documents" ([edit=sysop] (indefinite) [move=sysop] (indefinite))) |
Revision as of 13:02, 14 July 2016
Inserting Images
Instructions
1. Before you can insert any document or picture in your article you need to upload the corresponding file into the wiki!
- Follow the steps as described here: "Uploading Pictures and Documents"
2. Click on the "Image" option in the edit toolbar.
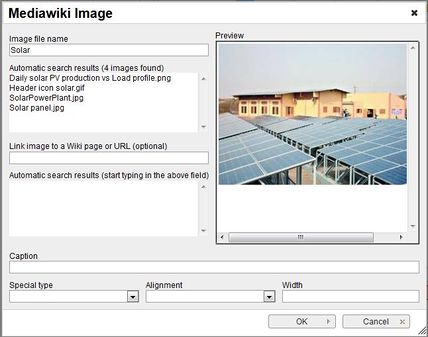
3. For the option, "image file name" , type the name of the file you want to use.
- The option "Alignment" provides the opportunity to put the image right, left or center of the article.
- Text entered in the panel “Caption” will be shown when you move the cursor over the graph or as caption when you chose the "Special type" -> "frame". If you choose "frame", then you cannot reset the size of the image.
4. Click on OK. The graph will now appear in the edited text.
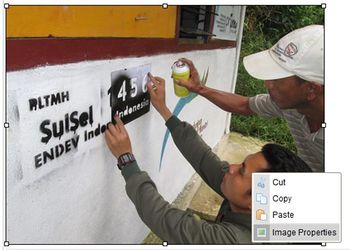
5. To change a file´s height or alignment, scroll over the picture or filename, then right click and choose "Image Properties".
6. To remove a graph from the article highlight it in the edit mode and press delete on your keyboard.
Inserting File
- For inserting file as a picture/link, see Insert File as Picture / Link


