SPIS Toolbox - Acceptance Test PVP

| ►Back to the Start Page | ►Back to the Module Page | ►Go to the Next Chapter |
4. Acceptance Test PVP
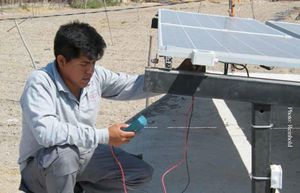
Upon completion of the installation, the functionality and the performance of the system should be tested in the presence of the future user (producer). The testing includes a number of separate analyses. The first step is the acceptance test for the photovoltaic pumping system (PVP) which includes the PV generator, the mounting and tracking system (if part of the system), the controller and the water pump. These components are the “engine” of the SPIS, their performance is vital for the successful use of the irrigation system.
This acceptance test (also referred to as Site Acceptance Test, SAT) is the second level of material testing in view of quality management. Manufacturers of system components are obliged to run a Factory Acceptance Test (FAT) prior to releasing products to the supplier. Ideally, both levels of testing should be presented when evaluating an SPIS, but are not always readily available.
The acceptance test for the PVP includes the following main steps:
- visual check of all main components and their joints / connections;
- visual check of wiring and insulation;
- mechanical check of mounting and tracking system;
- functional check of PVP operation;
- functional check of the PVP electronic controller
- existence of system documentation (technical data sheets, electrical wiring plan, operational procedures);
- measurement of solar irradiance, electric power, pumping head and water flow so that the difference between calculated flow and actual measured flow can be established.
The measurements are usually carried out in the following sequence:
|
Measurement of solar irradiance --> Calculation of electrical power output--> Measurement and calculation of total pumping head --> Measurement of actual water flow ---> Comparison of measured and designed water flow |
The different measurements should be carried out within a short time interval under clear sky conditions. At least two acceptance test runs are advisable, measuring at high irradiance (800 – 1,000 W/m2) and low irradiance levels (approx. 500 W/m2). The equipment for the test will be provided by the installer.
|
Important: Check on the tightness of seals and joints, screws and bolts. Check for signs of corrosion and cracked concrete foundations. Check for leaking pipes and fittings. Record any deficiency and malfunction and discuss their amendment with the installer by the installer! |
The results of the acceptance test should be compared with the design performance of the PV pumping system. The DESIGN – Pump Sizing Tool could be used to record the most important data and to compare it with the design values. The acceptance test protocol should be signed by the installer and the producer.
The tool SET UP – PVP Acceptance Test provides more details on the steps, required equipment and calculations involved in the acceptance test.
Outcome/Product
- Completed acceptance test for the photovoltaic water pumping system;
- Comparison of actual performance to design performance;
- Acceptance test protocol:
- SET UP – PVP Acceptance Test.
Data Requirements
- Measured solar irradiance, total pumping head and water flow;
- Calculated electrical power output, design, pumping head and design water flow;
- Observations from visual check.
People/Stakeholders
- Producer;
- Installation service provider;
- Agricultural service provider.
Important Issues
- The on-site acceptance test is mandatory to verify if the PVP systems achieves design performance.
- Testing should be done by the installer in presence of the producer considering all relevant criteria.
- Testing requires clear sky conditions, a minimum of two measurements need to be done.
- A thorough check on the mechanical parts is recommended.
| ►Back to the Start Page | ►Back to the Module Page | ►Go to the Next Chapter |


