TUEWAS Toolbox - User Guidance
Contents
1. Category Structure
2. Web-based Toolbox Database
3. Toolbox Navigation
4. Conducting a Search
5. Adding an Entry to the Database
6. Editing and Deleting Entries
1. Category Structure
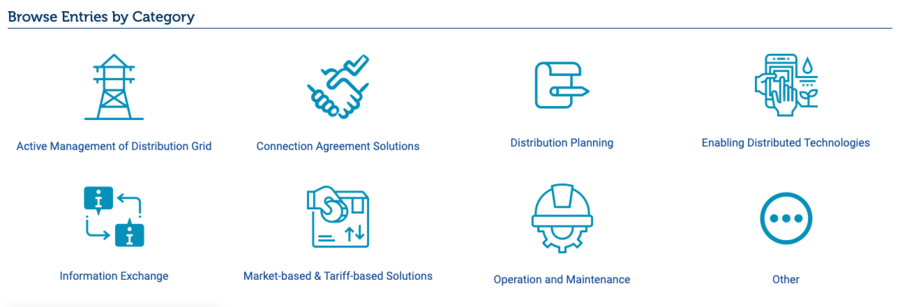
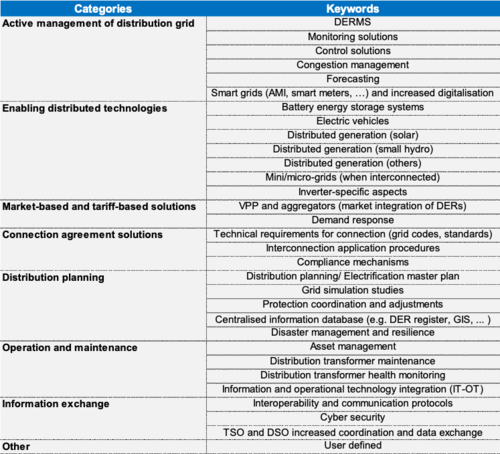
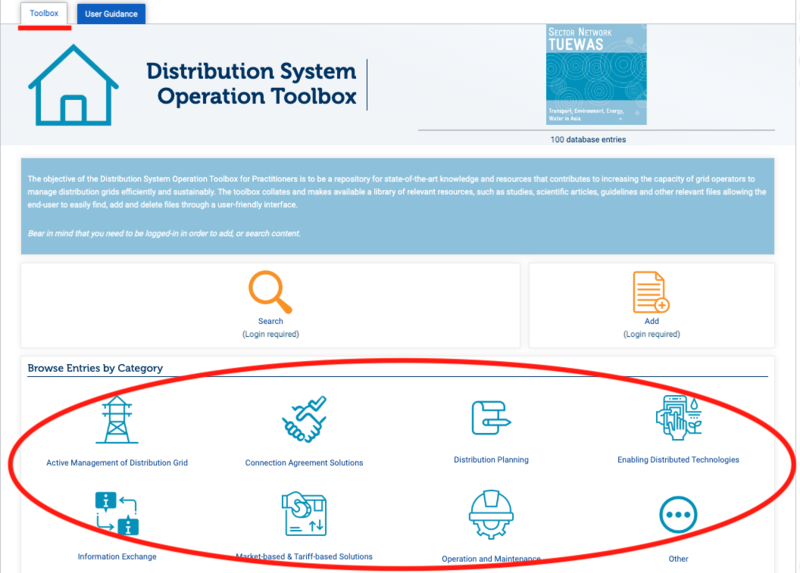
The category structure allows the storing of files according to categories. Eight categories have been defined in the current version of the Toolbox (Figure 1). Each file is assigned one main category (which also determines in which overview page the file is stored). With the use of key words, which are defined for each category (Figure 2), the search options can be expanded beyond the main categories. This will be further detailed in Section 4.
2. Web-based Toolbox Database
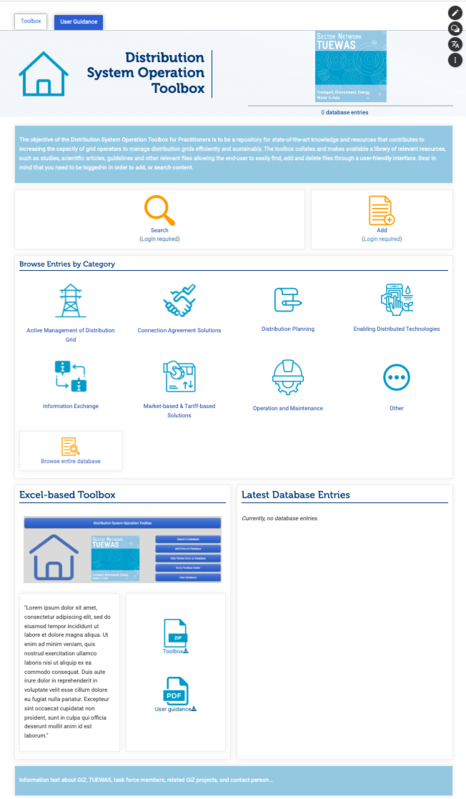
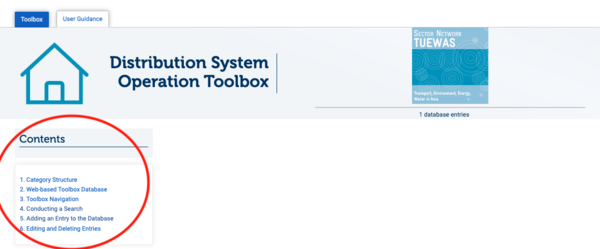
The Toolbox Database is a web-based platform that uses ask queries to allow the user to easily search for entries that have been added to the database system. It also allows the user to add new entries to the database and to make edits to individual database entries. The Web-based toolbox consists of three main areas: 1) Toolbox, 2) Search, and 3) Database. The Toolbox page (Figure 3) provides a description of it, as well as a link to the TUEWAS website. Next to that, the Toolbox page mainly acts as an interface that allows the user to access the different pages of the database, as well as the category structure.
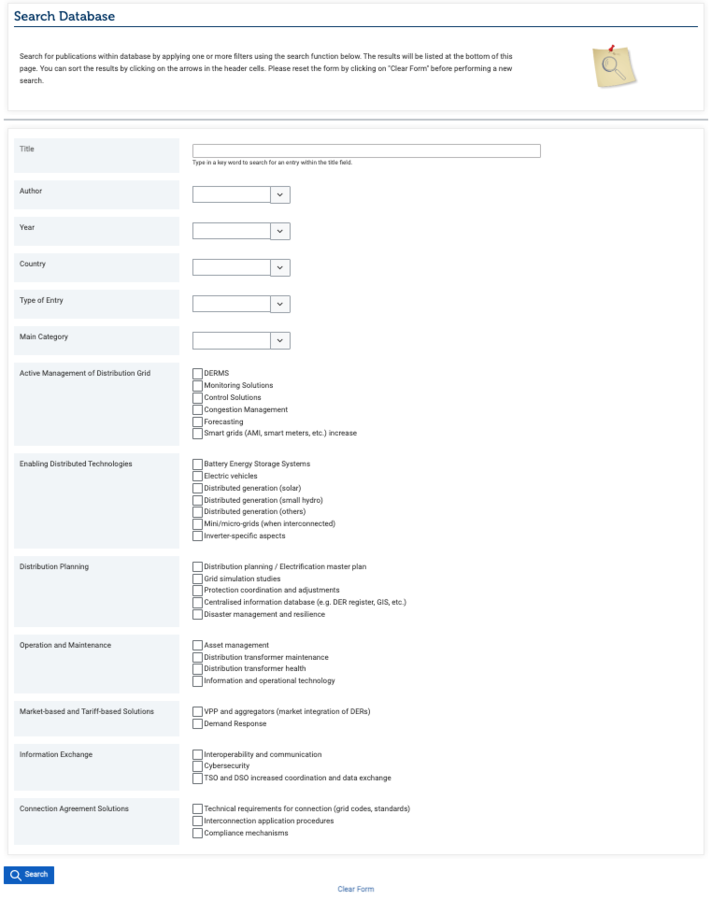
The Search mask (Figure 4 and 5) consists of an online form with data input fields that allow for a user-friendly filtering of the database. Fields are available for categories, author, year of publication, country and type of material. How to conduct a search is further detailed in Section 4.
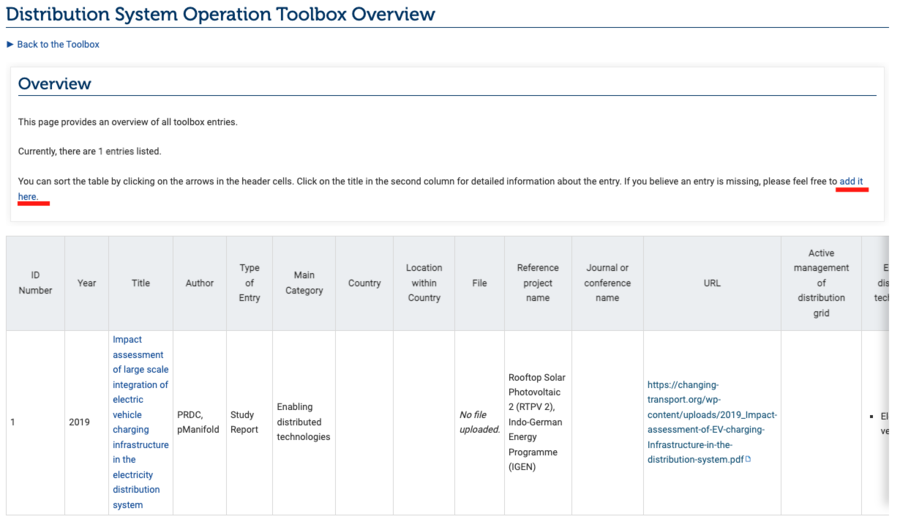
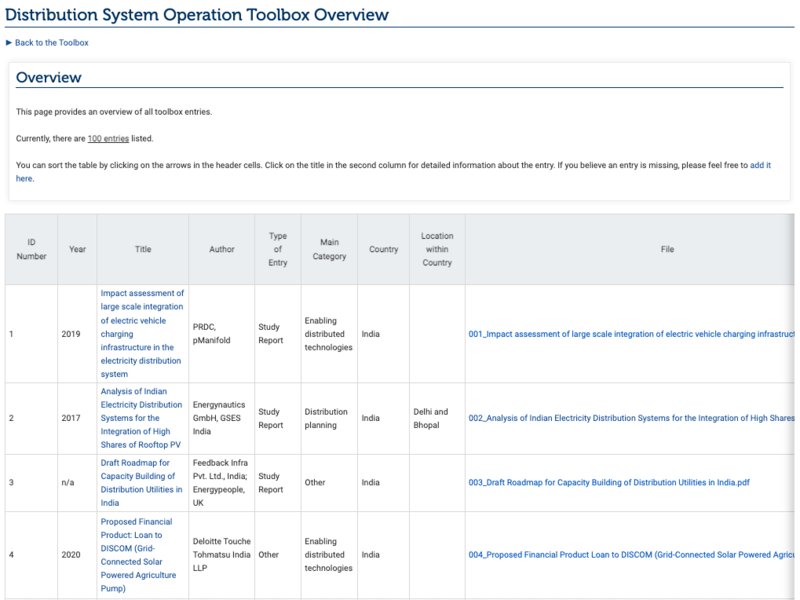
The Database browse page (Figures 6 and 7)contains the entire list of documents that have been deposited in the filing system and provides detailed information about each file, including title, author, publication year, type of entry, category, country, etc. The database browse page also includes a link to add a new database entry (Figure 7), should the user not find the entry they were looking for immediately.
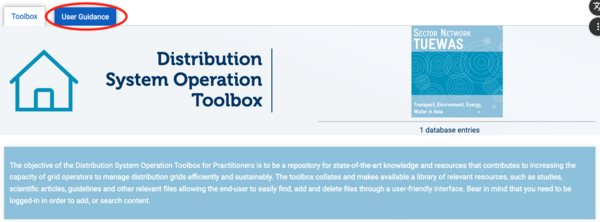
From the Toolbox home page the user can access all the main functions of the Toolbox. The search, add and edit functions are further detailed in Section 4, Section 5 and Section 6, which are written in instruction style to be used in the User Guidance. From the Toolbox home page, the user can also navigate through the category structure directly and go to the User Guidance tab (Figure 8), in case they need further information on how to use the Toolbox (Figure 9).
4. Conducting a Search
On the Toolbox tab, scroll down and click on the Search icon (see Figure 4). The user will be redirected to the Search mask (see Figure 5).
In the search mask, you can filter entries from the database by entering data into different fields (fig.). There are 6 fields: 1) Title, 2) Author, 3) Year, 4) Country, 5) Type of Entry, 6) Main Category. The remaining 7 fields correspond to the Category structure, for which there are several checkboxes for each category. You can choose which way to best use the fields to find what you are looking for, i.e., there is no need to use all of them (Figure 10).
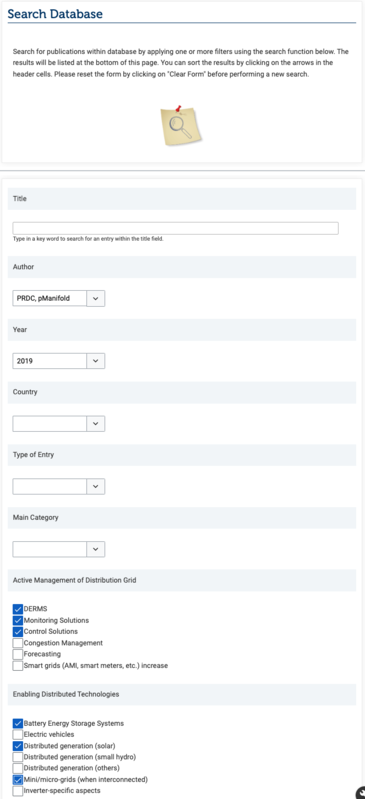
Each new field selected for filtering will add to the previously selected filtering criteria. For example, by selecting Viet Nam in the country field, as well as “Control solutions” and “Battery energy storage systems” in the category fields, the filtered results will be those for Vietnamese sources that are marked with both keywords.
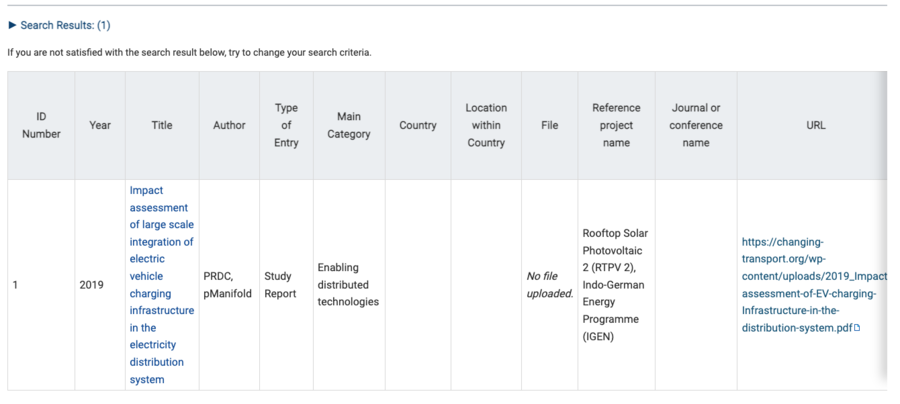
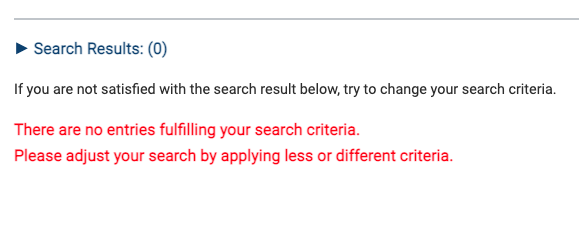
The search results will display in a table at the bottom of the page (Figure 11). If no results are shown, it means there are no entries fulfilling all the selected criteria, so you will have to adjust the search by applying less or different criteria (Figure 12).
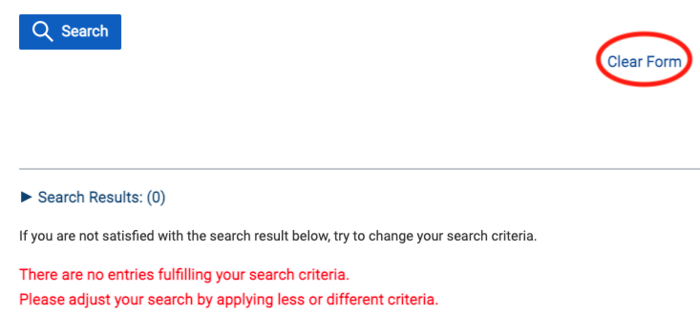
Click on the "Clear Form" link to clear the results in the table and start a new (fresh) search (Figure 13).
Some of the text fields will suggest an existing data input so that the user search for existing entries only. E.g., if there is one entry with Benin as a country, and the user types "B" in the "Country" field, the field will suggest a list with all entries with countries starting with the letter "B". This way, the user can easily find entries that actually exist (Figure 14).

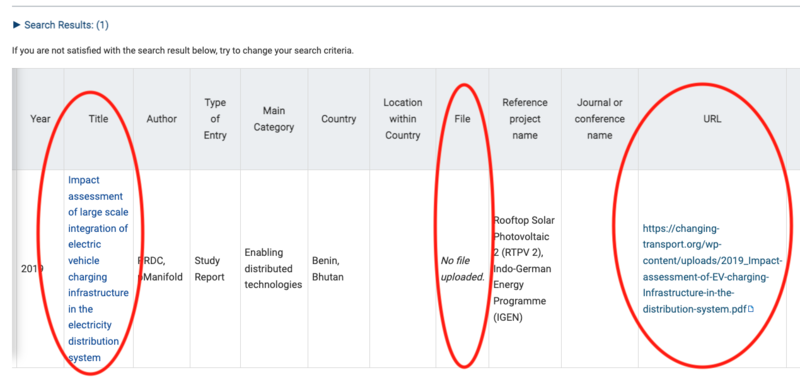
You can either choose to open the loaded files from the search table by clicking on "File" (if uploaded) or "URL" (if available). Alternatively, you can click on the link under “Title” to navigate to the database entry page and get more information on the filtered documents (Figure 15).
5. Adding an Entry to the Database
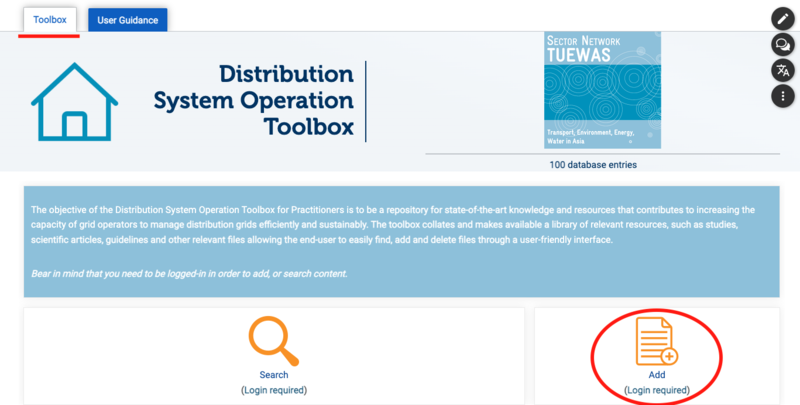
You can expand the database by adding new files, allowing you to build your own personalised Toolbox over time. To add a new file (a new database entry), you must click on the orange “Add” icon in the Toolbox tab, which will prompt a data entry form (Figure 16).
Bear in mind that in order to be able to add new entries or information in general, you have to be logged-in.
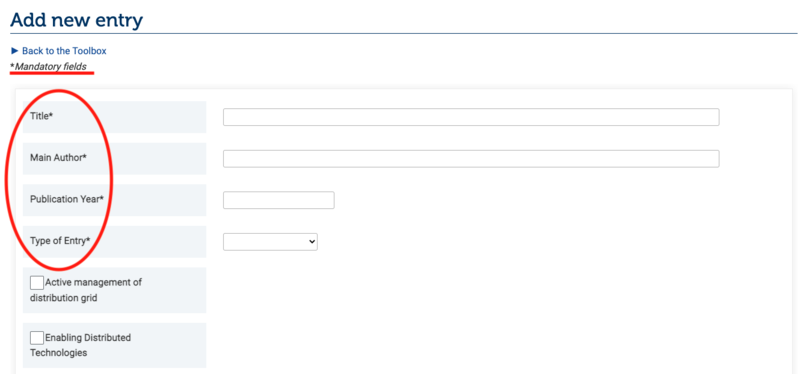
To successfully add a new file, all fields that are marked with an asterisk (*) are mandatory (Figure 17). The choice of at least one category and one keyword is obligatory and you must assign the main category, which determines in which overview page the file (if you are uploading a file) will be saved. Other fields are optional. We do recommend adding as much information for each entry as possible to facilitate future filtering and use of the Toolbox.
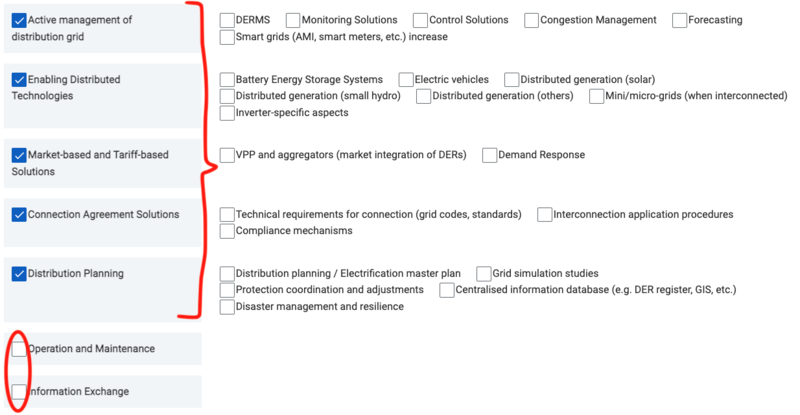
Bear in mind that to select keywords from each category, you first have to select the desired main category or categories, in order for them to display a list of their keywords (Figure 18). Any category left unchecked will not display the list of their keywords and upon saving, the category will not appear in the page. Click "Save Page" to complete the data entry.
6. Editing and Deleting Entries
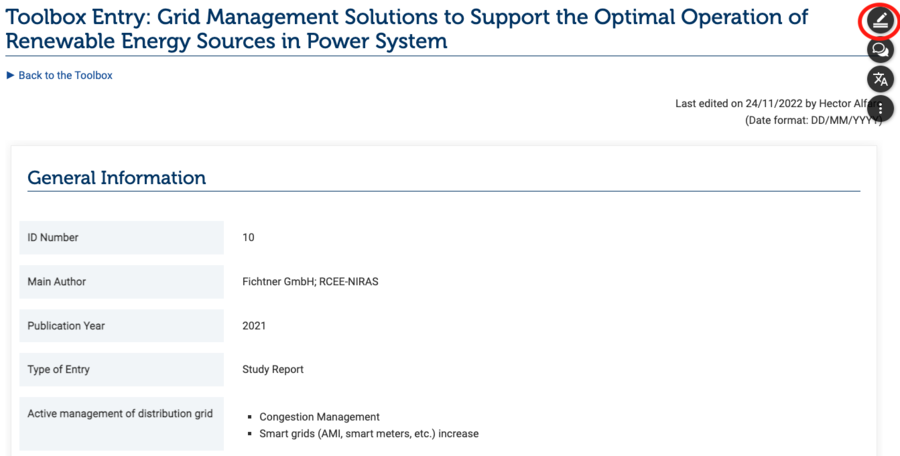
To edit an entry, simply click on the desired category overview page in the Toolbox tab and locate the page in question (Figure 19).
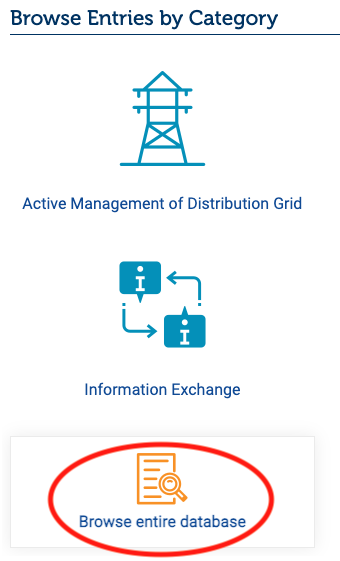
Alternatively, you can browse the entire database by clicking on the orange "Browse entire database" icon (Figure 20), which will direct you to the entire database overview (Figure 21).
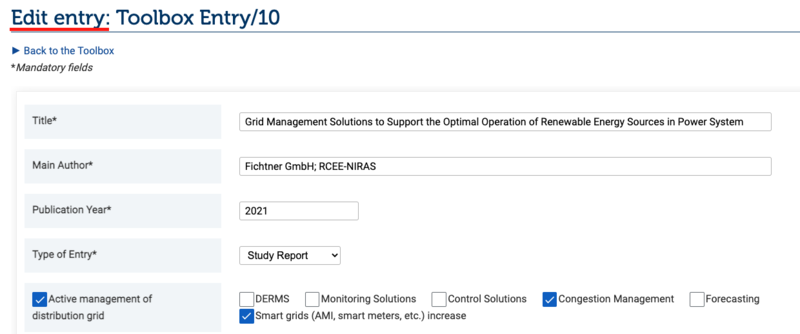
Once you navigate to the desired page, simply click on the "Edit page" icon (Figure 22), and modify the corresponding information (Figure 23). Bear in mind that deletion of pages and files are actions reserved for users with administration permissions only. If you wish to delete a page, please get in touch with an administrator at info@energypedia.info.
